Sunday, December 9, 2018

Mother Nature puts on a show

Friday night it was foggy after dark.  Because it was cold the next morning our trees looked absolutely amazing.  This is not really unusual for Minnesota.  It happens a couple of times each winter but today's was particularly stunning.  I grabbed a few pictures but of course they do not do justice to the real thing. 
barn and pasture

North yard

The River Birch

The house is behind the big evergreen

The tree between the evergreen and driveway closeup below. 

different angle, the house roof and dormer is peeking out

East of the driveway and the orchard


Frost on each branch and trig of the tree west of the driveway

If you look closely you can see each longer blade of grass is coated
Of course, by the end of the day the frost was gone.  Much of it fell out of the tree with the gentle breezes and the rest was melted by the little bit of sun that we had.  Still it is fun to see.

Joining BNOTP here.

Friday, November 30, 2018

beeswax food wraps

In the summer I have a table at our local farmers market.  It is a small group of vendors and at one of the neighboring tables is a couple who have beehives and they sell their honey and beeswax along with garden produce.

I buy their honey and have bought their beeswax.  Besides cooking with the honey I put it in my honey and oatmeal soap.  I have used their beeswax to make candles and am considering pouring it into chocolate molds to make tree ornaments.

My most recent beeswax project was to make food wraps.  Food wraps are a reusable alternative to plastic wrap.  They can be used to wrap food or cover containers.  There are quite a few etsy sellers offering them for sale but I have not seen them locally in our often behind the times rural community.  When I mentioned them to my much trendier metropolitan daughter she said that she was wanting some and thinking of putting them on her Christmas list as they were a little pricey.  Prior to this they were barely on my radar but I did order the other ingredients and make some.  The farmers market season had ended but I did offer them for sale at a craft fair that I participated in the weekend before Thanksgiving.  Only one customer that stopped by had heard of them, having been given a set last year as a gift.  She said that she was still learning to use them.  There was some curiosity about them but, alas, no purchases.  It seems my kids will be getting some in their stockings this year.  :)  I will be using mine this winter so that I can share personal experiences with the customers at the market next year.

I do understand how they can be pricey.  The ingredients are kind of unusual and not available in stores around here.  Perhaps they could be found in a bigger metro area but I needed to order mine. I also had to purchase a lot more of the ingredients than I would need for a couple of batches of wraps.  The process is not hard but time consuming.  The melting of the ingredients involves the pine gum being melted first and then the beeswax being added to it and allowed to melt.  The jojoba oil goes in last and then when all are combined they are painted onto the fabric squares one at a time with a paintbrush and then since the mixture begins to harden as it cools the sheet is placed in a warm oven for a couple of minutes to soften the hardening beeswax mixture and brushed again.  A second sheet is added as a blotter for the first, they are turned over so the blotter is on the bottom and warmed again.  After another brushing to spread evenly the wax mix the first sheet is hung to dry and the process is repeated again with the blotter becoming the new first sheet and a second sheet becoming the new blotter.

drying on my pasta rack


When making my food wraps I used the instructions found here.

Shared with BNOTP here.

Wednesday, November 28, 2018

A repurposed thrift store find

When I check out our local Goodwill or some of the other thrift stores I occasionally visit I tend to spend the majority of my time in the housewares section with a quick swing through the frames, the furniture and the fabric/linens.  Less frequently I peruse the books but I really need to be in the right mood for books unless it is a cookbook.

One of the things that I have been finding is drapes.  I have been grabbing them up to repurpose into reusable grocery or market bags.  I have been picking them up for cheap but haven't had too much time for sewing them until now.  So this week I did the first of the bags.  The drapery used for this bag is a pretty gray and cream buffalo check.  There were two narrow panels priced separately at $2.99 each.   I don't recall what I actually paid since I often have a coupon or a senior discount which are 25% off so it was probably less.  The fabric is a heavy home decor type fabric and the curtains are made with a blackout type lining that was attached on both of the side edges and the top edge and loose at the bottom hem.  Cutting across the panel I was able to use the side edge of the curtain for the top edge of the bag.  The second side edge was trimmed off and became the handles.  A little bit of thread and a couple of french seams on the sides and bottom and a couple more seams to box off the base and the bag was done.

Completely lined, the bag is sturdy and should hold a lot of stuff.  And the best part is that the each panel should make  two and one-half bags.  My mom loves buffalo check and hates plastic grocery bags so I am thinking that when I get the other four done I will see if she wants to use these when she does her shopping. 
The first finished bag

Interior
A fun quick project.

Shared with BNOTP here.

Monday, November 26, 2018

Jack's Gift

The first of my handcrafted gifts for this year is done. I shared in my previous post that I was hoping to restart a long neglected sewing hobby and this is one of my first projects.  My brother makes a killer cheesecake.  It is a little embarrassing.  I taught him to make cheesecake but his cheesecake is far superior to any that I have made even though he still uses the recipe that I gave him.  'Our' recipe uses a 10 inch diameter springform pan and this year for his gift I am giving him a smaller 6 inch diameter pan so that he can make cheesecake for a smaller crowd without having half a cake left over.  The handcrafted part of his gift is a pair of potholders with his recipe printed on them.

I had never printed on fabric before.  There are many methods out there on the web.  I used one where the fabric is attached to a piece of freezer paper cut to the size of typing paper and then it is run through the printer.  I prewashed my fabrics to remove any sizing and make sure that it wouldn't shrink when the finished project was laundered.  I double checked to make sure that my printer ink was compatible with printing on fabric.  I prepared my document so that it was the size that I wanted for the potholder and bolded the font to make it a little darker.

After I printed it I cut it to size and applied fusible interfacing to the back.  I then attached a single layer of cotton batting and the ticking fabric to make the pocket.  I made the potholder that the pocket was going to be attached to by sandwiching four layers of the same cotton batting between two layers of ticking.  The back ticking layer was cut larger so that it could be folded over the edges of the potholder and stitched on the front making a binding.  I sewed a few lines of quilting on the potholder then attached the pocket.  I attached a hanging loop in the left upper corner as I stitched the binding in place.  I am happy with the result.  I learned one method for printing on fabric.  My new sewing machine with the self threading feature allowed me to sew all I wanted without needing to get help when my needle came unthreaded.  And I have one gift done.

Sharing with BNOTP here.

Jack's cheesecake recipe is here.

Sunday, November 18, 2018

Done

The farmers market season is over.  The garden has been put out of its misery by the onset of cold weather.  Thanksgiving is coming and I have a lot for which to be thankful.  I am a glass half full kind of girl and one of the things to be thankful for is that we get to start over again next year after a challenging this year.  I am thankful for new beginnings.  Very thankful.

After only posting one blog post all summer I am looking forward to seeing if I remember how.  I have a couple of ideas of things I could share.  I am probably a little late to the party but I made some beeswax food wraps.  My intention was to make them to sell at the holiday extravaganza that i had committed to having a table at.  My thought process went like this--if they didn't sell I could always put them in the kids' Christmas stockings or save any surplus for next year's market.  I only took one picture of the process, and that picture was of the finished wraps drying on my pasta rack.  That is not going to be a photo-laden post.

I have made a couple batches of homemade soap but I am eager to try another method of soap making and more recipes.

I am trying to restart an old sewing hobby.  My poor eyesight has made it pretty difficult to sew.  Threading the needle on the sewing machine was impossible.  I recently bought a different sewing machine, one that threads itself.   Additionally one of my favorite fabric stores closed this summer but before they did they had deep discounts on all of their fabrics.  I bought fabric for a duvet cover and curtains for my newly gray bedroom.  I bought fabric for table linens and throw pillows and linen bread bags and reusable grocery bags.  I have been watching youtube videos about making purses and bags and it looks like fun. 

I haven't added any recipes recently to my recipe blogs.  But this summer I took breads and scones and biscotti and fun jelly to the market.  I tried to expand my repertoire of gluten free offerings for the market, trying to make that my niche in our small group of vendors.  I bought some fun pasta making tools, wood ones for cutting pasta and ravioli and gnocchi that I should learn to use.  And vintage steamed pudding molds. 

I haven't done any tablescapes with any new to me dishes.  I could at least share some thrift store finds.

I haven't started the table that will hold my vintage sink that will be outside.  I have barely started to build the bar that will go in my chicken coop.  Both are outdoor projects that could see a little progress on a sunny winter day.

And...we have three weddings next fall!  So that will mean engagement parties and bridal showers  It is going to be so fun.  My niece wants vintage dishes used at her wedding so her mom and I are on the hunt for white china and brass candlesticks.  I have some.  Well, quite a bit, actually.  Her mom has some too, but more are needed.  We like to thrift so it is not like it will be a hardship to search out the additional place settings that she will need.     

Yep, it is going to be a good winter.

Lorri    

Saturday, June 23, 2018

Finally a little update

No, I haven't fallen off the face of the earth.

Looking back on my last post on this blog there was still snow on the ground and now we have passed through spring and the first day of summer.  Blogging has taken a backseat to life.  Just about everything that could cause havoc in my life has given its best shot and I am still limping along.  I have lots of not yet finished projects.  The ones that I shared in the last post are still not finished but I am moving forward and they will eventually be crossed off my to do list. 

Still painting.  Still doing the window trim but I am enjoying my new windows. 

The maple sap season is done, and I have some syrup tucked away.  My new buckets worked pretty well. 

The lettuces and greens in the greenhouse are done until fall.  The plant starts for the summer garden for friends and family grew and have been delivered.  Lots of the big garden is planted and so far no rabbits have gotten in to sample anything.

The farmers market has started back up.  I missed the first day but have made it to three since then.  there are not a lot of vegetables available yet so the customer traffic has been a little light.   I am finding some new gluten free recipes and so my repertoire is slowly expanding.  No one else in our small market is doing gluten free so I am hoping to fill a need.

I have been trying to add some perennial fruit to the farm each year.  The fruit that I ordered this year arrived and was planted.  They were bare root and all are getting new growth.  This year's additions are an apple tree, two peach trees, 12 grape vines and four blueberries.   

Libby, the new puppy is growing like a weed.  She still plays in the water and is muddy everyday.  She has a innate ability to find water.  Leaky hose--she will find it.  Puddle at the end of the sump pump hose--finds that too.  When we weren't getting rain and I was spending a lot of time watering she was my constant companion, drinking from the hose and splashing in the water, Now that Mother Nature is helping out with lots and lots of rain she finds all the low spots with the standing water.

It has taken two days to get this little update done and there aren't even any pictures.  Such is the story of my life right now.  Thanks for visiting.     

Sunday, March 25, 2018

Busy time at the farm

Lots of stuff going on at the farm.  It is pretty chaotic but here is what I am working on.

It is maple syrup season

The farm has two maple trees and now is the time of year when the sap is collected.  There is a magic time when the days are warm but the nights are still cool that causes the sap to move.  This is I think the third year that I have collected sap and made syrup.  Last summer there were two gentlemen who would drive past the farmstand on their way to the lake and stop to buy tomatoes.  My farmstand is self serve with payment on the honor system so I had not met them until their last trip for the summer.  The dogs were barking up a storm so I walked out to make sure that everything was okay and we struck up a conversation.  Turns out that one of the gentleman does maple syrup on a quite large scale and his family has done it for a couple of generations.  He told me that he would bring me some buckets that he uses, a little different style than the ones that I had started with, when they came back in the spring.  He was true to his word and a couple of weeks ago they showed up with buckets and taps and tubing.  He set up two buckets with six taps on one tree and there was enough extra to do two more buckets and six more taps on the other tree.  Once a supply of sap is collected it is cooked to evaporate the water and concentrate the sugar.  It takes quite a while.  Generally it takes 40 gallons of sap to make one gallon of syrup.  Sap is perfectly clear when it comes from the tree and thin like water.  It is the cooking that causes the color to change to caramel and the syrup to thicken.  Cooking produces a lot of steam so the initial evaporating is usually done outside and then finished up on the stove in the kitchen.  So far I have collected about six pails of sap and have been cooking it to evaporate the water.  It has been cooler during the day so the sap production has slowed but will pick up again when the days are a little warmer.  The slow down allows me to catch up with the cooking.  I am bottling my syrup in mason jars and am starting to get a few pints on the shelf.

sap bucket sitting in new snow
half full of sap

The greenhouse

The greens in the greenhouse are appreciating the longer days.  I have some that have bolted and gone to seed and some new ones that will replace them.  I am also in the process of making room for the seedlings that will eventually go to friends and family and be sold on the farmstand and transplanted into our own vegetable garden.

new greens

ready to eat
This year I kept nine pots of strawberries in the greenhouse hoping for winter berries and although there were no berries during the winter the plants are liking the longer days and are starting to flower.  I am hoping for a jump on the season.  These will spend their summer outdoors and then back in the greenhouse for the winter again.   

strawberry
The herbs that were in pots outside last summer and the ones that I repotted into smaller pots from the large planters made it thru the winter and are thriving.  The greenhouse smells wonderful when you brush up against the herbs.

oregano

lavender lots of new growth

rosemary some is flowering

thyme with a few flowers

sage ready to flower
Seed Starting

I have been starting seeds in the house.  These are the going to be the transplants that will be for sale on the farmstand come May and transplanted into the garden once winter has decided that it is finally done.  The tomatoes and peppers and herbs all benefit from starting indoors.  This year we are sticking with our tried and true varieties but also some new varieties.  Our grocery store has been selling cherry tomatoes as an assortment in pint containers, different sizes and colors and I am thinking that I will do the same at the market so we added a few new cherry and cocktail type tomatoes.  

This year I am starting some flower seeds in addition to the vegetables and am planning a cutting garden.  I am hoping to sell flowers at the farmers market in addition to the vegetables and baked goods.  I am planning to dedicate a couple of rows in the garden for perennials and then also some annuals.  Last year I had a section of my garden that didn't get planted and was full of thistle and milkweed and the pollinators loved it.  I am thinking that I will intentionally leave a bit of that as well as the new flowers.
flower seedlings
peppers

tomato and asparagus

ready to pot


New windows

I am replacing all of the drafty old windows in my house.  I am thinking that they are the original ones.  Right now the windows are sitting in a trailer in my yard.  Weather permitting hopefully the installation will start soon.  As part of that process I will be removing and replacing all of the interior trim and while the old trim is off and before the new trim goes up I am planning to paint the rooms on the main floor.  I am moving in a more neutral direction.  My kitchen has been white with one barn red wall and my living/dining room has been green with one white wall and a bit of burgundy in the stairwell.  The new color in those rooms is going to be gray.  The trim will still be white.  I have started painting the walls that do not have windows and will catch up the window walls once the windows are installed.    I have loved the look of my old wood six over one double hung windows with the pretty trim that matches the door trim throughout the house but the new vinyl windows will really add practicality and smaller heating and cooling costs.  I am going to do a farmhouse style trim so that will be a fun change.

kitchen before

kitchen after
before

this wall used to be green

Another thing that is keeping me busy is a new puppy.  Meet Libby.  She is a full time job although it is getting easier as she is getting a little bigger and spending more time outside.  She is a Great Pyrenees.  She is such a sweetheart.   
a muddy Libby

Lots of stuff going on.  Thanks for visiting

I am joining BNOTP for Met Monday here.

Saturday, February 24, 2018

learn and do sous vide edition

Do you sous vide?  I am brand new to the sous vide club.  My daughter got a sous vide as a wedding gift and she brought it home with her once on a visit to the farm and we made pickles and sampled some Limoncello that she had made at home.  I had been interested in having one of my own but hadn't gotten around to biting the bullet and getting it purchased.  I haven't been to any big fancy kitchen shops lately and I haven't seen them in our local stores.  Then, lo and behold just after  Christmas my sister and I spotted them in the larger Walmart in the neighboring town.  It was a different brand than the one that my daughter has and we decided that I would check out the reviews online before deciding to purchase.  A week later we were in the same neighboring town in Target and they had them too.  This time it was the same brand as my daughter's and they were marked down to save $40.  They had two left and we each bought one.

For those unfamiliar a sous vide (pronounced sue veed) is an immersion circulator.  It is a computerized heater with a pump that is placed in a pan or tub of water.  Food is added to the cooking container in plastic bags or glass jars and the sous vide warms the water to a specified temperature and holds it at that temperature while circulating the water around the bags or jars.  The food takes longer to cook, often an hour or hours, but it uses temperature not time to determine doneness.

The claim is that it can cook steak or other meats to perfection, restaurant quality even, in a bag in a pot of water with just a quick sear at the end..  I have not tried cooking meat yet but I have gotten my feet wet, pun intended, and I can share my first attempts.

The first thing I tried were hard cooked eggs.  We are big fans of deviled eggs and I am the one that brings them to our family gatherings.  I think that I have tried all of the old wives tales for how to get easy to peel eggs.  Sometimes they work and sometimes they don't.  One online sous vider promised perfectly cooked eggs that were easy to peel.  I tried them once, and the results were okay but nothing to write home about.  The yolks remained bright orange and moist and the whites were pretty tender and broke when I was trying to peel them or cut them in half but they tasted fine.  I might give them another try.    

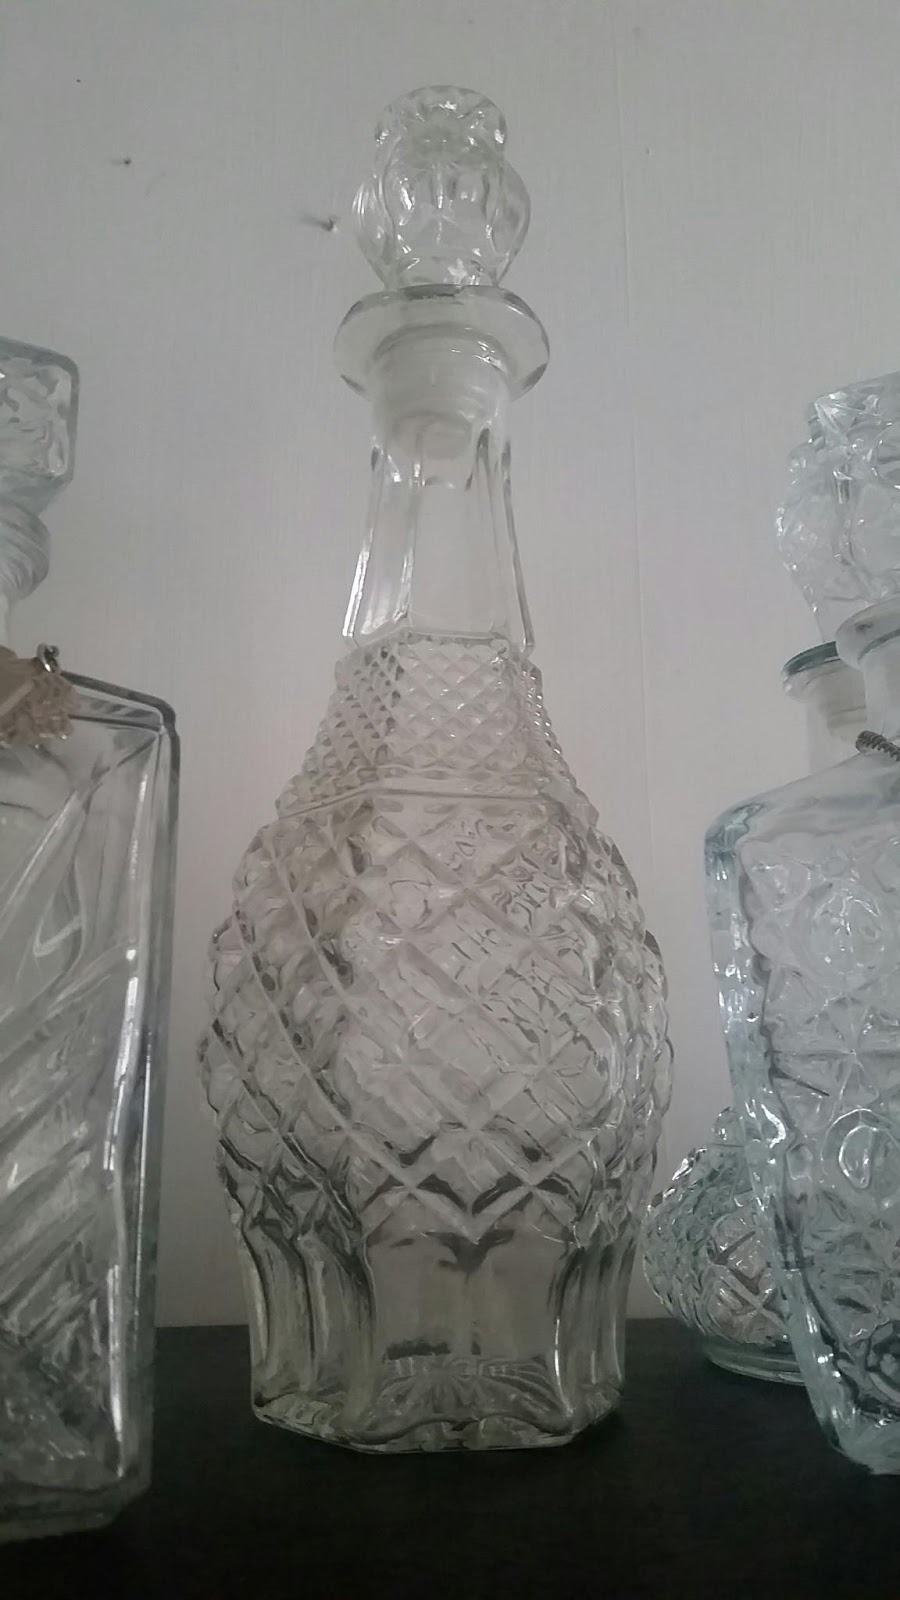
It has been Meyer lemon season in Minnesota.  We can't grow them here but there are a few weeks about this time of year when Meyer lemons can be found in the stores.  I had bought a bunch and decided to use them in my early sous vide experiments.  First I made limoncello.  The sous vide is used to infuse the alcohol with the lemon zest which is then strained and combined with simple syrup.  Traditionally the lemons are soaked in the alcohol for weeks and the sous vide reduces that time down to two or three hours.  My daughter makes her limoncello with Everclear but she lives close to Wisconsin and can hop over the state line and get the real thing.  On my side of the state the Everclear that can be sold in Minnesota has a lower proof and so I used vodka.  It turned out pretty yummy.  Right now I have it in canning jars in my freezer.  It doesn't freeze but is icy cold when you take it out.  I am planning to pour it into a pretty bottle or decanter for serving.  The Meyer lemons give it a really nice flavor.
Meyer limoncello

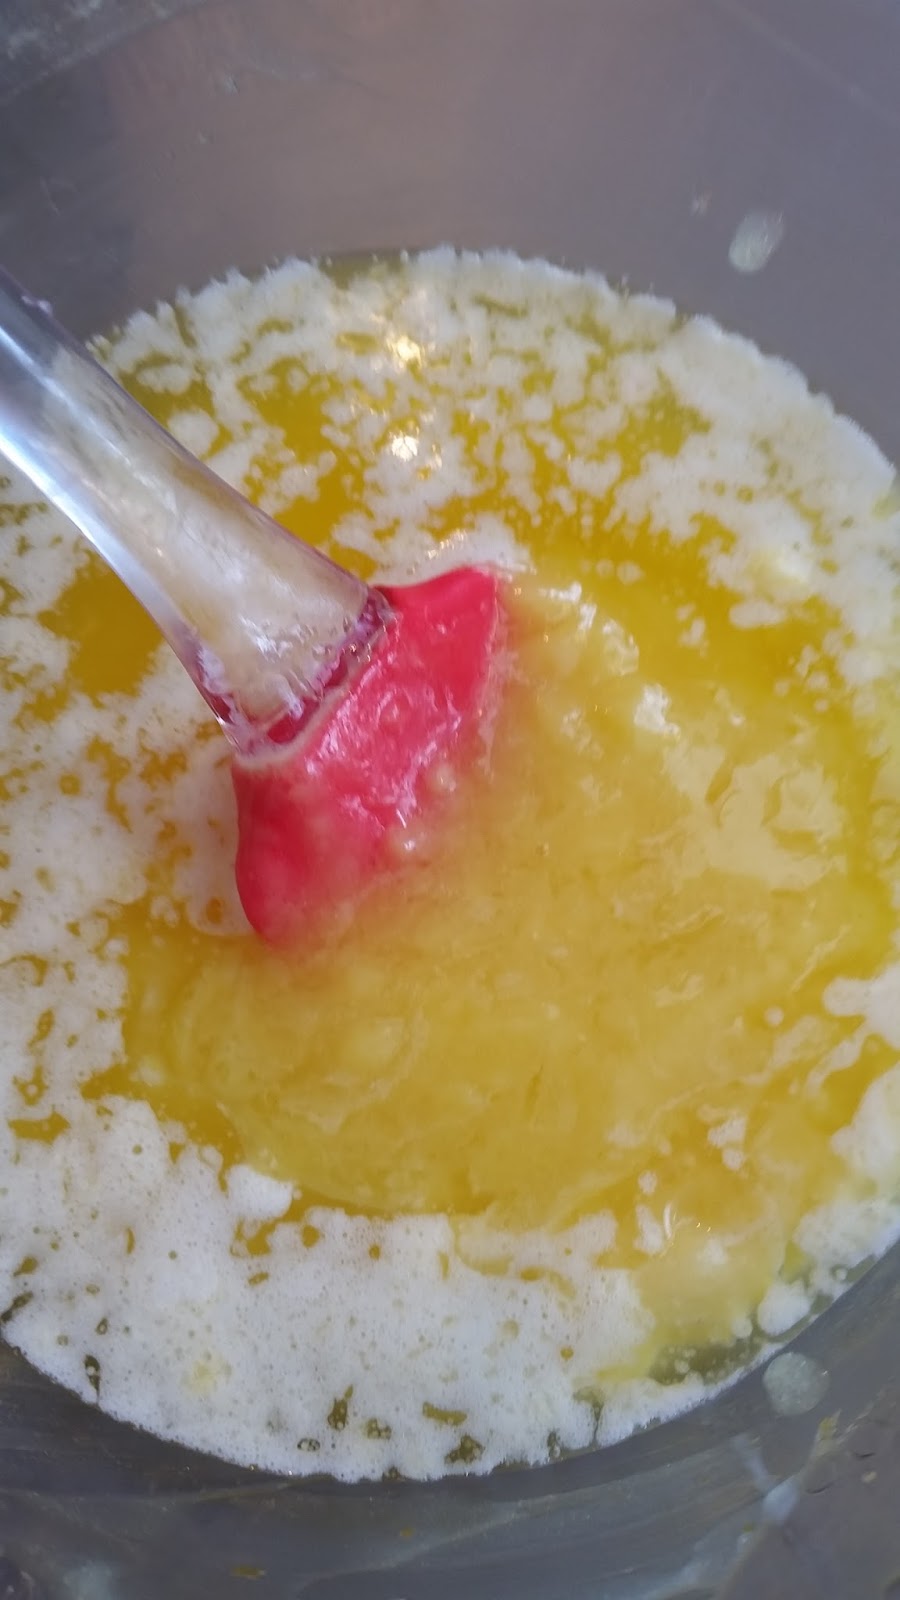
Then today I used the juice from those same lemons that I had zested for the limoncello in a Meyer lemon curd.  In the past my recipe for making lemon curd involved a double boiler and constant stirring.  With the sous vide, you whisk together the juice, sugar and eggs and pour it into the bag with the cubed butter.  The bag is placed in the water and once the contents of the bag reach 160 degrees the bag can be emptied into a bowl and whisked a few times to incorporate the melted butter into the rest of the ingredients and then poured into jars.  I left the lids ajar until the curd had cooled and then refrigerated one and put the rest in the freezer.  I made a first batch to test and when it was done and wonderful I decided to use the remainder of my reserved juice to make another batch.

The bag with the cubed butter and mix ready for sous vide


out of the bag and ready to whisk

finished lemon curd
My next attempt was a foray into homemade cheese making.  I have made homemade ricotta and homemade marscarpone in the past.  It involve careful watching of the temperature and with the sous vide I was able to put the milk in the bag and the bag in the cooking container and let the sous vide bring it to temperature without risk of scorching and constant watching.  I used goat milk to make goat cheese or chevre.  The milk is heated to temperature.  Lemon juice is added and the milk/lemon mixture is allowed to stand for ten minutes to allow the curds to form.  The mixture is then poured into a strainer for 1-2 hours and the whey is separated from the curd.  The curd is salted to taste.  The cheese ended up soft and spreadable but I think that it will firm up a bit when refrigerated.  I am considering adding herbs or garlic to the cheese for a flavored variety.  One quart of goat milk makes a cup of cheese and a couple of cups of whey.
sous vide working its magic

finished goat cheese
And supper, a salad with greens from the winter greenhouse with goat cheese, apple and pecans.


Sharing with BNOTP here.

Monday, February 12, 2018

It is finished

I have finally completed the dish pantry project that I first shared as almost finished here.  At that point I had done most of the work on the pantry itself and then discovered that the door did not fit the opening.  In hindsight the way to build the front wall that contains the door would have been to build the door frame and then the walls around it.  I considered planing off part of the door but the amount would have been significant and would probably have been more noticeable than I would have liked.  I eventually decided to hang the door from a barn door track.  This option has some challenges of its own.  Most doors on tracks are mounted on the wall so that the track covers the opening and slides fully to one side.   The door is wider than the opening so when closed it overlaps the opening and when it is open it hangs along side of the opening.

In my situation The door and the opening were sort of similar in size so no overlap.  The door opening was also centered and I had walls at both ends of the rail that limited how far the door could slide in either direction.  I also did not have very much clearance between the low ceiling and the top of the door.  So off to the store I went.  My sister went along and we were able to find a rail system that met my needs.  Although the black wrought iron rails have a definite farmhouse feel the wheel system on them is too tall for the space that I have.  I ended up buying one that was a brushed silver colored metal, maybe nickle.  It had the low profile that I needed and since I have quite a bit of metal in my adjoining kitchen already, stainless stove, shiny chrome industrial wire shelving and brushed metal under cabinet rails it fit in.

Of course it was too long for my space so back to the store for a tool to cut it.  A dremel made pretty quick work of the cut and did a nice job.  Next was figuring out how high to hang the bar.  The system that I chose had a two piece hanger that went on each end.  They needed to be level but they couldn't be attached with the bar in place.  The bar needed to be the right height so that the door would be off the floor so that it would glide properly when moved but not too high.  And the bar was a round one, not the flat ones that most rail systems have.  So there were a lot of curved surfaces to consider that were difficult to measure.  I eventually got the rail installed where I thought was the right height only to have the door a little long.  I was not about to rehang that hardware so I carried the door out to the shed and cut a little off the bottom.  Of course it was not able to hand straight so I wasn't sure how much to cut off and I could have cut a little less off than I did but I am happy with the results.

After the door was finished it was to finish up the rest of the area.  This is the main entrance to the house and it all needed a little freshening.  I removed a wallpaper boarder, new white paint on the walls, cubbies and the door and new black paint on the floor.  Here are a few after pictures.

The door

the barn door track

The floor

the cubbies

The door


Sharing with BNOTP Metamorphosis Monday here.

Monday, January 15, 2018

My Wexford Obsession

I thrift with my sister but we haven't always been thrift store addicted.  It happened innocently enough.  My younger daughter decided that she would start collecting vintage decor and dishes with the intention of starting a side business renting her treasures for parties and photo sessions.  One of the first patterns that she acquired was a group of Wexford stems.  Wexford is a sturdy pressed glass pattern made by Anchor Hocking in the 1940's thru 1960's.  The vintage glassware has a pretty distinctive pattern, small diamonds towards the top and larger diamonds towards the bottom.  Some places this is referred to as criss cross and occasionally it is called a waffle pattern.  When we noticed some glasses in Goodwill that matched my daughter's glasses we snatched them up.  My daughter lives across the state in a metropolitan area. My sister and I felt that while my daughter shopped the big city we could check the stores in the towns that we shopped and pick up things that she might like.

It turns out that Wexford apparently was pretty popular in our area because it has been readily available.  When we stop at Goodwill there is often one or more pieces and it is always reasonably priced. I now love it as much as she does and I now have many more pieces than she does.  She has not yet started her business.  Life has a way of intruding and she has had a lot of stuff going on right now and limited storage.  Perhaps soon.  When she gets ready to open her rental business I will happily share my pieces with her.  I don't have the place settings. No dinner plates, salad plates or saucers.  I have not seen them for purchase locally and have not searched them out online.  I do have many, many serving pieces.  I have six sizes of glasses, as well as punch bowls and punch cups.  I have footed sherbets, hexagonal salad plates, berry bowls.  More of some pieces than others but quite a bit of it.  Here is a sampling.  These pieces are currently displayed in my dining area.  The majority of the collection is in more functional storage on wire shelves in my basement.  None of the pieces are currently in the new dish pantry but I imagine that they will rotate in and out of there.
six sizes of glasses

canisters currently holding dog treats

ice bucket

two stacks of coasters

My newest piece was a gift.  Quite a long while ago I had written a post about my search for decanters.  I had read Helen, who blogs at Entertablement's, post about her husband's bar cart and her decanters and I was taken with the idea of a bar cart and I started my own collection of decanters knowing that at some point I would find the right cart to put them on.  Alas, I am still looking.  My good friend Kim, who blogs at Exquisitely Unremarkable, sent me a gift in the mail of a decanter that she found at an Etsy shop.  Unfortunately the decanter arrived in pieces having been broken in transit between the Etsy shop and the farm.  The only thing in one piece was the stopper.  It was a sad day.  Kim was not to be deterred and soon another package arrived.  This one arrived intact.  Turns out the decanter that she selected was the Wexford pattern and just happened to coordinate with my many other Wexford pieces. Thanks Kim!  It is a lovely piece.  It means so much to me that you would search out and send such a perfect gift.   
my new decanter

part of my collection on top of the bookcase